In this article
Java Message Service (JMS) is an API for sending data messages between systems. This article shows how to implement JMS features in Stambia.
Prerequesites
The JMS features require Stambia Designer and Stambia Runtime in version 17.2.8, or higher.
For this article, you need to install a JMS Server. We use OpenJMS as an example, and we also give information for ActiveMQ, OpenMQ and FFMQ.
Stambia can work with other JMS products, but we cannot cover all of them in this article. Please contact the support team if you have troubles setting up another JMS product.
Installing the JMS libraries
First download the libraries (jar files) from the JMS vendor, and copy them into the stambiaRuntime installation directory. Please consult the JMS product's documentation to know which files are required.
We recommend to store your libraries in a "addons" subdirectory in the Runtime lib directory.
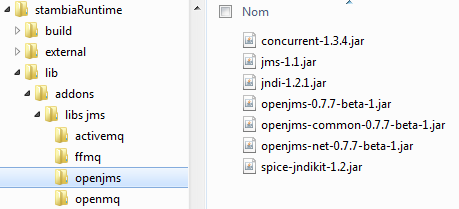
Then restart the Runtime.
Creating the JMS metadata
Defining Metadata
The JMS Metadata will hold information on the JMS server, the queues and the topics.
This metadata information can be used in processes through the JMS Actions, with the usual Stambia Metadata features (Referencing, Configuration, etc.).
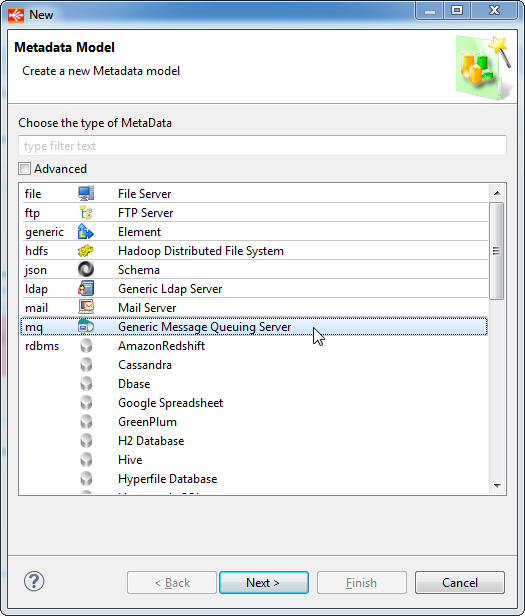
Create a new Generic Message Queueing Server metadata.
And set the properties as follows with your own settings
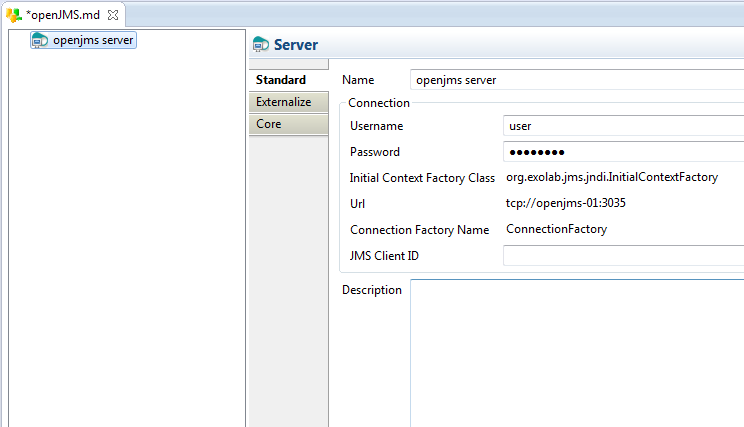
Please consult your JMS product documentation to know which are the correct values for the Factory properties. Here is an indication :
Active MQ :
Initial Context Factory Class : org.apache.activemq.jndi.ActiveMQInitialContextFactory
Connection Factory Name : ConnectionFactory
URL : tcp://<server>:<port>
Open JMS :
Initial Context Factory Class : org.exolab.jms.jndi.InitialContextFactory
Connection Factory Name : ConnectionFactory
URL : tcp://<server>:<port>
OpenMQ :
Initial Context Factory Class : com.sun.jndi.fscontext.RefFSContextFactory
Connection Factory Name : ConnectionFactory
URL : file:///<file location>
This location is the directory where the ".bindings" file is stored. It is necessary to copy this file from the Open MQ server,to a place the runtime can access.
This file contains information about the queues and topics and can be found on the Open MQ Server
FFMQ :
Initial Context Factory Class : net.timewalker.ffmq3.jndi.FFMQInitialContextFactory
Connection Factory Name : factory/ConnectionFactory
URL : tcp://<server>:<port>
Defining Queues
Right click on the Server node and choose New > Queue.
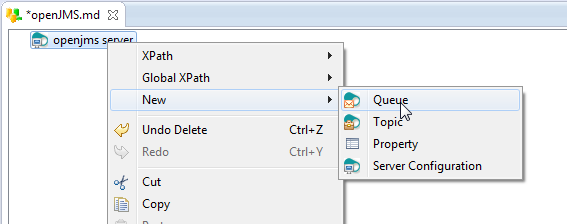
Note that the Physical Name must match the Queue name as declared on the JMS server.
Depending on their configuration, some JMS Servers create the queues on the fly, but if it is not the case, the queue defined in Physical Name must exist.
Active MQ specificity
Active MQ requires a property node for each queue under the Server node.
Right click on the Server node, choose New > Property.
Set Name = "queue.<nameOfQueue>", and Value = "<nameOfQueue>".
FFMQ specificity
For FFMQ, Physical Name must be queue/<nameOfQueue>
Defining Topics
Right click on the Server node and choose New > Topic.
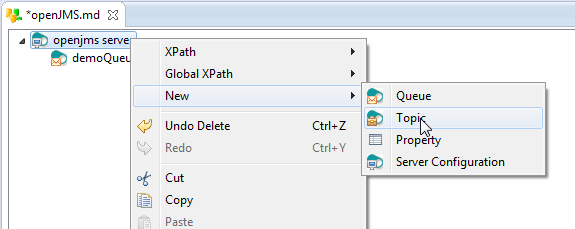
Like the queues, the Physical Name must match the Topic name as declared on the JMS server.
Depending on their configuration, some JMS Servers create the topics on the fly too, but if it is not the case, the topic defined in Physical Name must exist.
Active MQ specificity
1) Active MQ requires a property node for each topic under the Server node.
Right click on the Server node, choose New > Property.
Set Name = "topic.<nameOfTopic>", and Value = "<nameOfTopic>".
2) Active MQ requires that a JMS CLIENT ID is set.
Open MQ specificity
Open MQ requires that a JMS CLIENT ID is set.
FFMQ specificity
1) For FFMQ, Physical Name must be topic/<nameOfTopic>
2) FFMQ requires that a JMS CLIENT ID is set
Note about JMS CLIENT ID
You can set this property on the server node or individually in each JMS Actions in the process.
It is a string property which is used by JMS to separate the different client's applications. (Ex: You cannot have multiple processes running at the same time with the same clientId).
Defining Subscribers
Right click on the Server node and choose New > Subscriber.
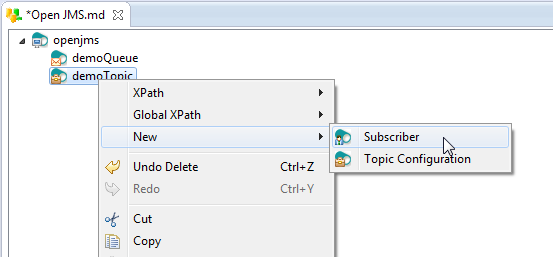
Most of the time subscribers are created on the fly, so they don't have to exist on the JMS Server.
Using JMS In processes
Overview of the Stambia JMS Actions
The Designer's Palette contains three Actions in the "Internet & Network" category:

- JMSSendMessage
- Sends a message to a JMS Server.
- JMSReceiveMessage
- Receives messages from a JMS Server. This Action can be used as a source of a Bind Link.
- JMSOperation
- Performs the specified operation. For example committing / rollbacking.
You can use these Actions in your Processes. We will see all these Actions in detail below.
Queues
Sending a message to a queue
We are going to use the Send JMS File Messages Action, which send JMS message(s) from file(s). The message(s) are contained in the file(s).
Process overview
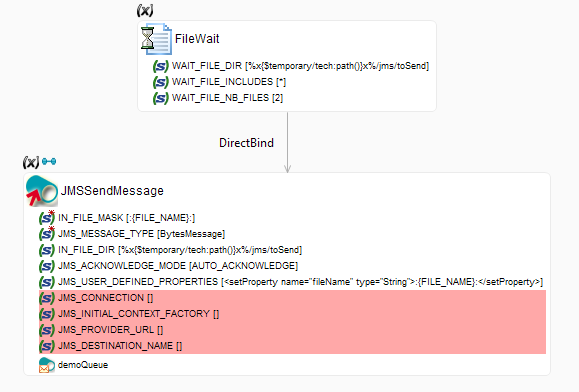
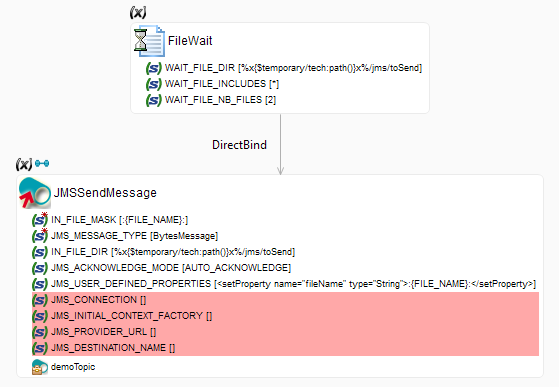
The File Wait
We use here a file wait action to bind the parameters of the files (File name for exemple) directly to the JMS Action.
With that, a JMS Message will be sent for each files found by the File Wait.
Our files here are juste simple text files which contains an 'Hello World'
The JMS Action
We dragged and dropped the queue node of the metadata on the action, which permits to fill the associated properties in it (JMS_CONNECTION,JMS_DESTINATION,...)
IN_FILE_MASK is the mask for the files used to send the message. we set it to :{FILE_NAME}:, which is the name of the file taken from the bind.
JMS MESSAGE TYPE is set to ByteMessage
IN_FILE_DIR is the directory in which the files are.
JMS_ACKNOWLEDGE_MODE is set to AUTO_ACKNOWLEDGE. The acknowledge mode is the way the consumer is going to inform the provider it has successfully received a message
JMS_USER_DEFINED_PROPERTIES is used to set custom properties. We set it to <setProperty name="fileName" type="String">:{FILE_NAME}:</setProperty>. here we set a property in which we put the name of the file. We will be able to retrieve and use this property when we will receive the message (shown in the next part).
Receiving a message from a queue
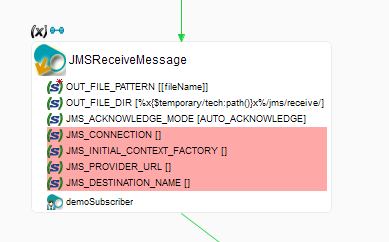
We are now going to use the Receive JMS File Messages Action, to retrieve the message we just sent before.
Process overview :
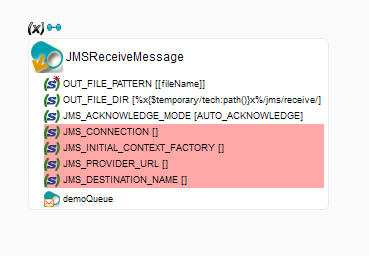
Like the Send Action we dragged and dropped the queue from the metadata.
Note that we are using [fileName] in the OUT_FILE_PATTERN parameter. It is the custom jms property we set in the Send Action in the JMS_USER_DEFINED_PROPERTIES parameter. You can use it with [propertyName].
Topics
Sending a message to a topic
To send a message to a topic, the operation is the same as the one for a queue.
You can drag and drop (or fill the properties associated) the topic from the metadata on the receive action and set the other properties, like we saw for the queue.
Receiving a message from a topic
To receive a message from a topic, drag and drop the topic subscriber from the metadata on the receive action and set the properties like for the queues.
