The internal structure of Mappings evolves silently between the versions to support the new Mapping features, to improve its cache indexation, and to make it more efficient.
The Designer updates the model version of existing Mappings through different ways, which are explained in this article.
Advantages of having up to date Mappings
Before going into details about how to upgrade Mappings, let's explain why it can be interesting to do so.
As told in the introduction, the way Mappings are structured internally, which means how is stored in the Mapping file what the user has developed, evolves between versions.
The evolutions are not directly visible by users, as it touches how the internal structure used to store information about the Mapping is organized, but it is however an important part of the Mapping itself.
When the model version evolves, it is most commonly to support storing information about new features, or to improve the cache indexation by storing more information about the Metadata used.
Having Mappings up to date will therefore offer better performances, and better efficiency on how it is handled by the Designer.
Upgrading Mappings to latest model version
Mapping save
Mappings are automatically upgraded to the latest model version when saving it.
The Designer checks if the version is up to date and upgrades the Mapping as a consequence if it is not.
User has nothing to do for this task, this is automatically done when saving a Mapping.
Context menu
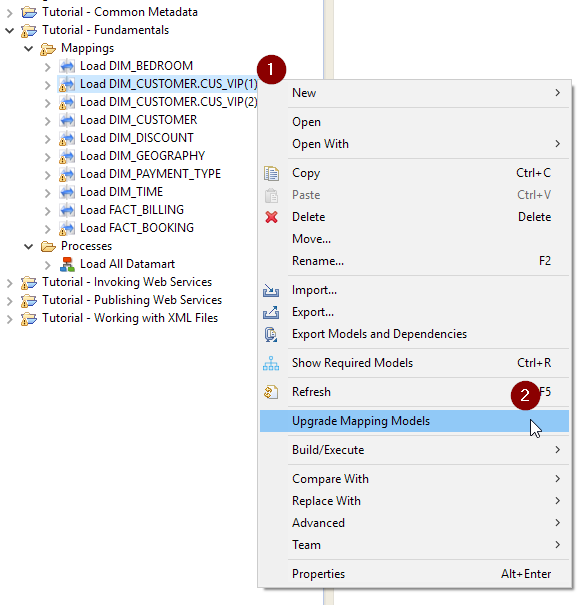
On the Project Explorer, the right click context menu which is available on Projects / folders / or Mappings has an option to upgrade the Mappings, if some are outdated.
When the Mappings of the selection are up to date, the menu is not displayed, nothing has to be done.
You can notice which Mappings needs to be upgraded by looking at their icon in the Project Explorer.
When a Mapping is outdated, a little warning appears, with a dedicated entry in the "Problems" view.
This requires Designer S19.0.11 or higher, as previous versions only showed the warning and upgrade button on Mappings coming from S17 versions.
Mappings which need to be updated
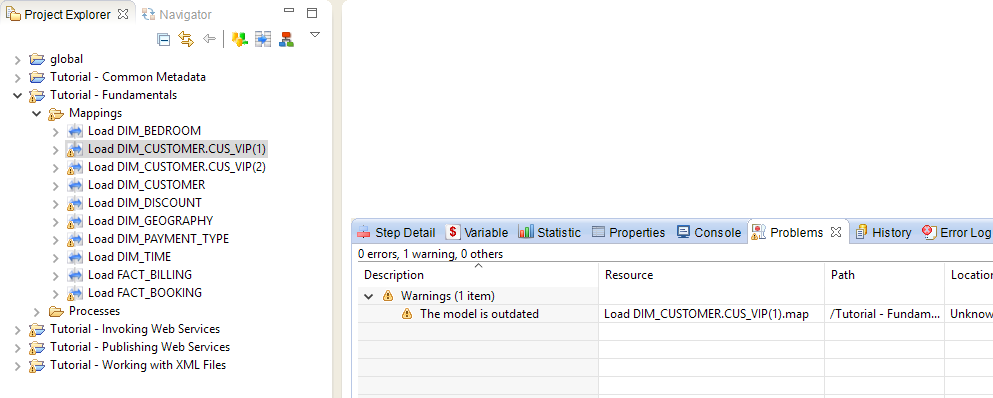
Upgrading all the outdated Mappings of a Project
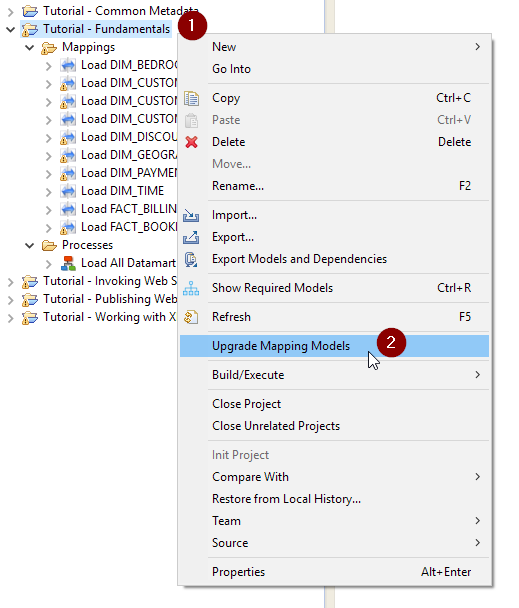
Upgrading all the outdated Mappings of a folder
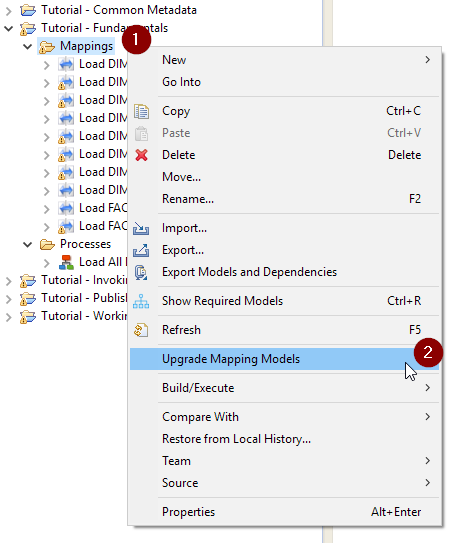
Upgrading a selection of outdated Mappings
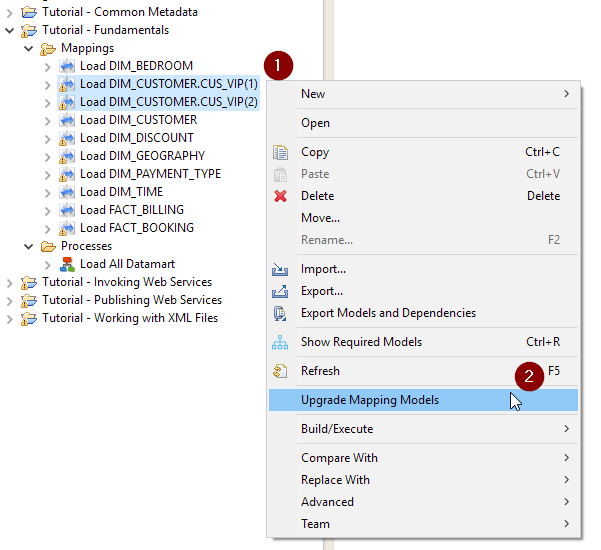
Upgrading one Mapping
Command Line
The last way to upgrade Mappings is to use a command line utility which will upgrade all the Mappings of a given Workspace.
This solution offers the possibility to upgrade everything in one shot, which can be useful on big Workspaces.
The command line can be used as follow.
Prerequisites:
- Stambia DI Designer S19.0.11 or higher
Preparing a script file
The first step is to create a little text file, that we'll name "script.txt" in this article, in which the following line should be written:
upgradeMapping
Executing the command
As we now have the required script file, we can launch the command line tool.
For this, navigate to the Designer installation root folder in a command / terminal window, and use the command below:
java -jar plugins/org.eclipse.equinox.launcher_1.3.0.v20120522-1813.jar -application com.indy.shell.application -data "WORKSPACE_PATH" -script "SCRIPT_PATH" [-logFile "LOG_FILE_PATH"] -console –noSplash
Example:
java -jar plugins/org.eclipse.equinox.launcher_1.3.0.v20120522-1813.jar -application com.indy.shell.application -data "D:/workspaces/workspace_common" -script "D:/scripts/script.txt" -console –noSplash
| Parameter | Mandatory | Required Designer | Description |
| -data «WORKSPACE_PATH» | Yes | S18.3.2 or higher | Path to the Stambia Designer workspace in which the Mappings should be upgraded |
| -script «SCRIPT_PATH» | Yes | S18.3.2 or higher | Path to the script file created on the previous step |
| -logFile «LOG_FILE_PATH» | No | S18.3.2 or higher | Path to a log file where information about the command will be logged |
| -console -noSplash | Yes | S18.3.2 or higher | These two options are required and used to launch the tool in command line mode |
| -cleanProjects | No | S18.3.3 or higher | Rebuild all the Mappings / Processes temporary built files before executing the script (It corresponds to the Project > Clean menu that can be used in the Designer) |
| -rebuildCache | No | S18.3.3 or higher | Rebuild the cache before executing the script (It corresponds to the Rebuild Cache menu of the Impact View in the Designer) |
| -importFrom | No | S18.3.3 or higher |
This option allows to import other projects that are not in the workspace which is defined with -data option. Specify here the path to a folder containing Projects that you want to import in the workspace before executing the script. Important:
|
This is the same command line utility as the one used to build packages. You can add other operations in the script after the 'upgradeMapping' if needed.


