Git is a powerfull version control system, which can be integrated to Stambia Designer. This articles explains how to install the required plugins.
Note: these plugins can also work with BitBucket which relies on git.
Installation of Egit plugins
1. Open a new empy workspace (menu "File / Switch Workspace" and specify a new directory)
Installation works better when processing with an empty workspace. You will switch back to your usual workspace at the end of the installation process.
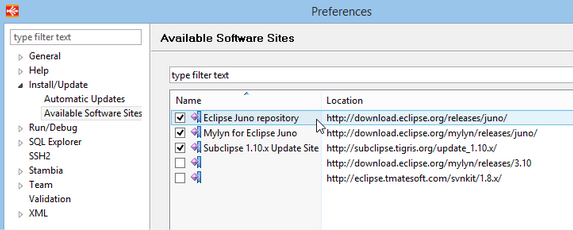
2. Make sure the "Eclipse Juno Repository" software site is referenced in Stambia Designer preferences. This is necessary for plugin dependencies.
If missing, you can add it:
- Name: Eclipse Juno Repository
- Location: http://download.eclipse.org/releases/juno/

3. Install the Egit and JGit plugins
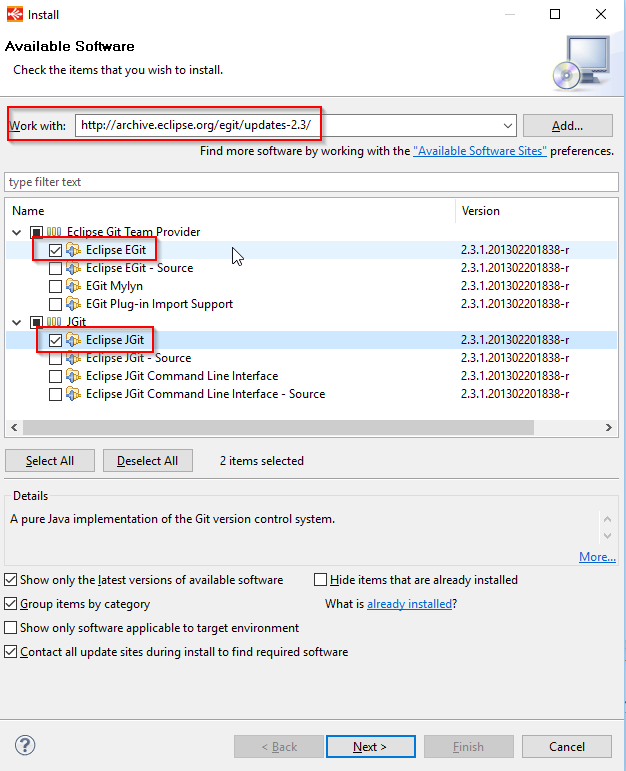
Open the menu "Help > Install new software..." and paste this URL in the "Work with" field: http://archive.eclipse.org/egit/updates-2.3/
Then select only the plugins "Eclipse Egit" and "Eclipse JGit", DO NOT check the other ones:

4. Click "Next" and proceed to installation.
5. Restart Stambia Designer and select your usual workspace.
Configuration and more information
The Git configuration is done in Stambia Designer Preferences, under "Team / Git".
Please ask your Git administrator for details on the configuration.
More information on Egit can be found here : http://wiki.eclipse.org/EGit/User_Guide
Installation issues
Under some combinations of Operating system / Java version, the installation process may produce errors or hang.
Please make sure that you are proceeding the installation with an empty workspace!
If your workspace is empty and you still have error/hang issues, then:
- make sure that the progress bar does not move any more
- kill the Designer process
- start the Designer from the command line: stambia.exe -clean


