The Web Services Metadata is shipped with a wizard to help the user testing and reversing HTTP REST Web Services.
This wizard allows to define the input and output parameters, the URL to request, the method to use, and then to perform a test request with test values to see the response of the Web Service.
Last, but not least, it offers the possibility to choose what should be reversed in the Metadata.
Prerequisites:
- Stambia DI Designer S19.0.0 or higher
HTTP REST Reverse Wizard
Metadata preparation
Accessing the HTTP Rest Wizard requires to have a Web Services Metadata.
Create a new Metadata or open an existing one, and specify the server, service, port, and operation nodes.
If you need to create a new Metadata, here is the necessary steps:
- Create a wsdl metadata and immediately Cancel the popup wizard (it is a Soap-only wizard)
- In the metadata editor, click the Server node and set its Name property (for example "MyWebservices")
- Right click the Server node / New / Service, and set its Name property (for example "MyRestService")
- Right click the Service node / New / Port, and set the Name, Address, Protocol (HTTP) and Verb (see the example in the screenshot below)
- Right click the Port node / New / Operation, and set its Name property
- Save the metadata
In this article, we are going to use a Stambia Published Web Service to demonstrate how to use the wizard:
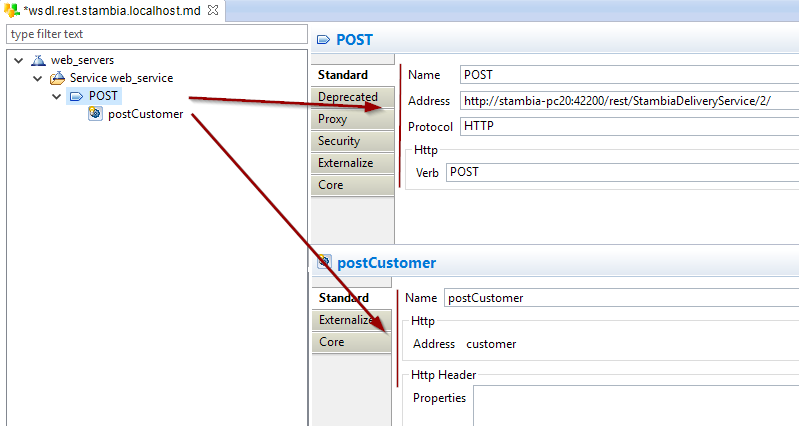
That's all, the Metadata is ready to use the wizard.
Using the Wizard
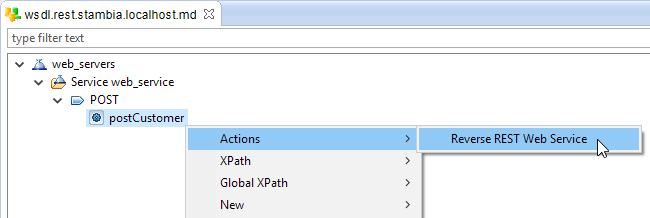
To launch the wizard, simply right click on the operation, and choose Actions > Reverse REST Web Service
The wizard starts, and you can now specify everything required to test and reverse the Web Service.
Here is an overview of our final invocation with everything configured:
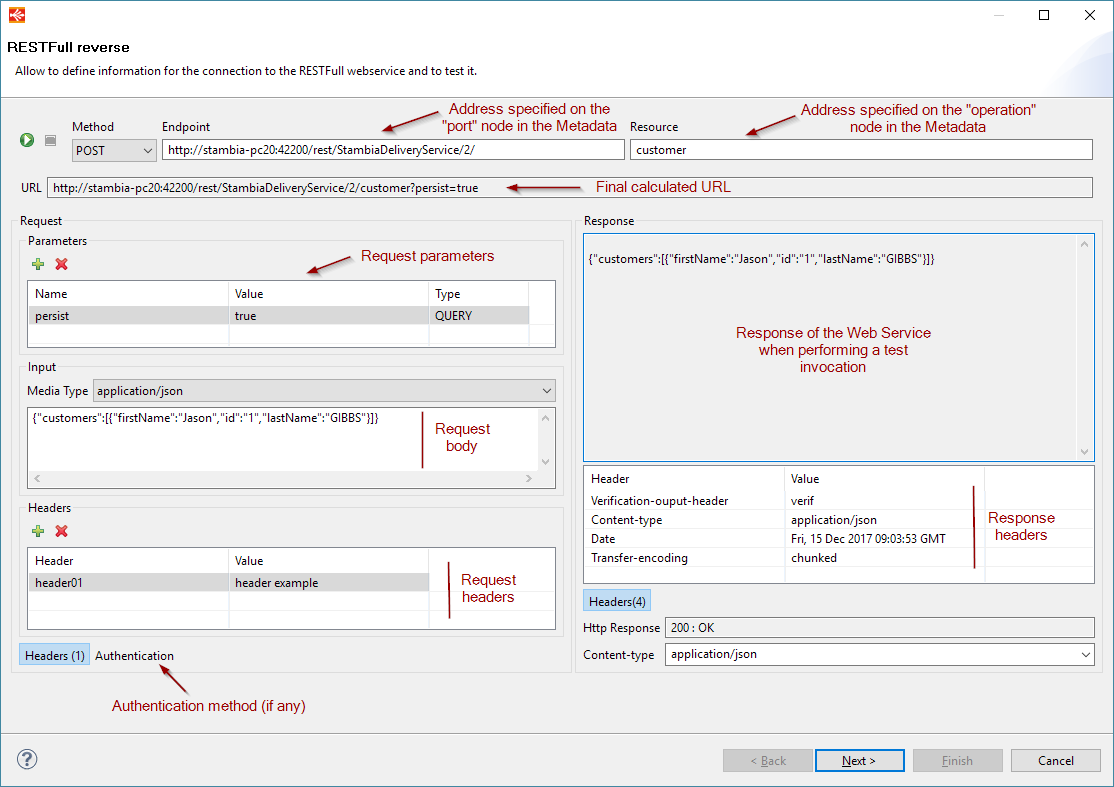
Let's explain now how we get to that point!
Request Input Definition
The first step is to define the request (input) parameters, headers, body, and authentication on the left part of the wizard:
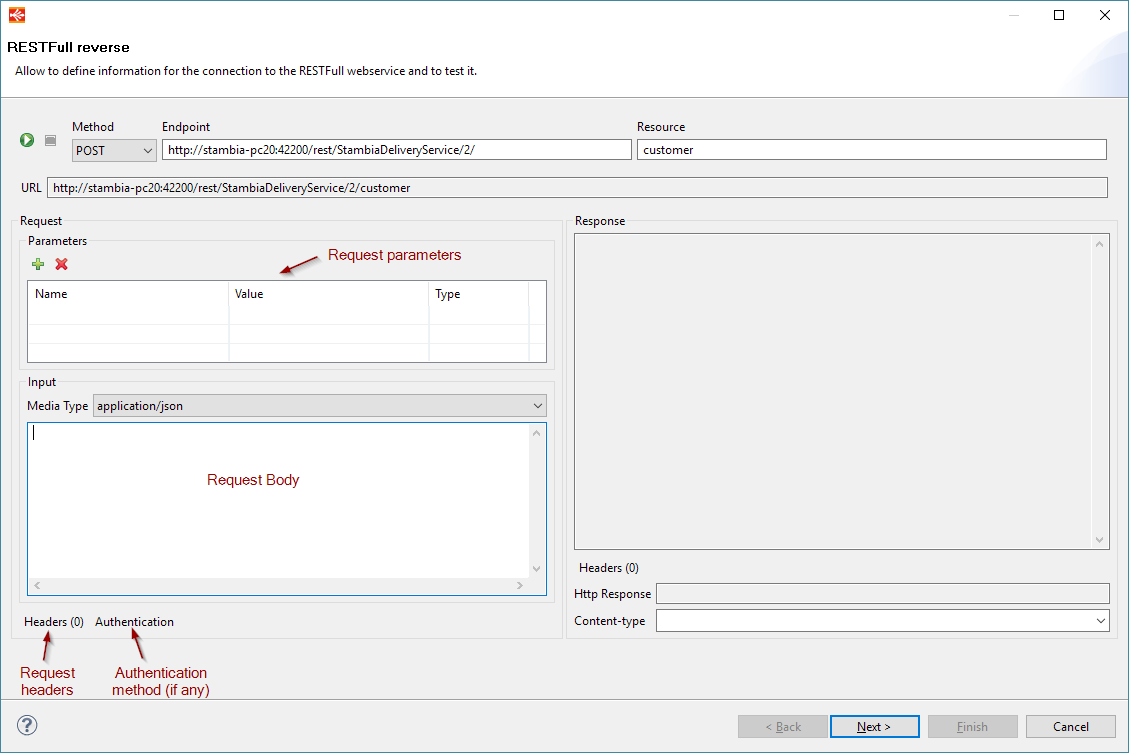
Request parameters
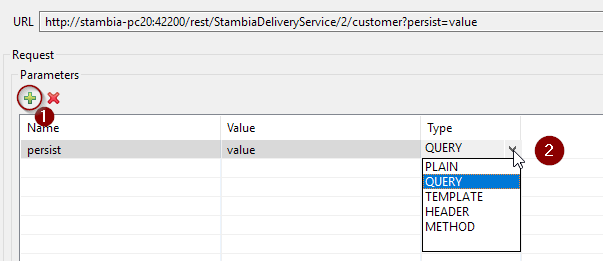
In the request parameters part, you can define new parameters by clicking on the "+" button.
Specify then which type of parameter it is, its name and test value:
About the value
The value is a test value that will be used when performing a test invocation to retrieve the response of the Web Service.
It will not be stored in the Metadata at the end.
About the Type
The "Type" defines the type of parameter it is.
The following types are available:
| Type | Description |
| PLAIN |
Plain text parameter that will be added directly in the body of the request as 'application/x-www-form-urlencoded'. You can add multiple plain parameters, they will be concatenated in the body. When at least one plain text parameter is defined, you'll not be able to manually set the request body, as it will be filled with the plain parameters. |
| QUERY | Parameter that is added at the end of the request URL. |
| TEMPLATE |
Parameter that replaces a user defined mask in the request URL. When using this parameter, you must add in the request URL (in the 'Resource' part for instance) the mask to be replaced. The syntax in the URL is the following: {Template parameter name}. You can find an example below. |
| HEADER |
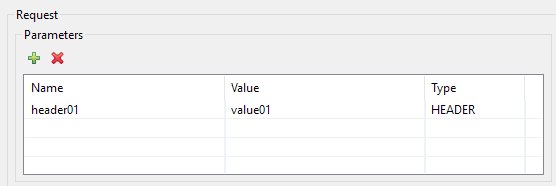
Parameter that will be added as an HTTP header when invoking the Web Service. An HTTP header defined like this will be reversed in the Input Metadata of the Web Service to be able to specify it dynamically in the future Mappings that will invoke it. If you want to define an HTTP Header with a fixed value, that will never change and must be transmitted at each invocation, please look at the 'Request Headers' part of the wizard that is explained further in the article. |
| METHOD |
Parameter that allows to override the HTTP method used when invoking the Web Service. This will be reversed in the Input Metadata of the Web Service to be able to specify it dynamically in the future Mappings that will invoke it. |
Example of PLAIN parameters:
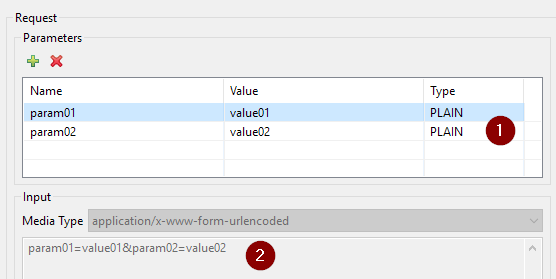
You can see the calculated test value in the Input body
Example of QUERY parameter:
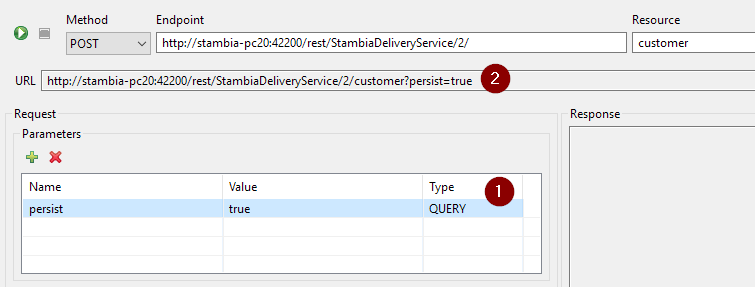
You can see the impact on the calculated URL
Example of TEMPLATE parameter:

You can see the impact on the calculated URL
Example of HEADER parameter
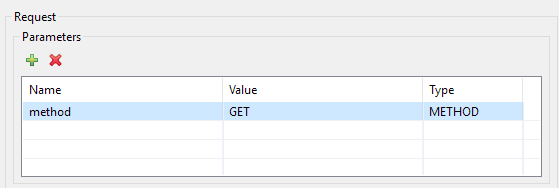
Example of METHOD parameter:
Request body
The request body part represents the input body of the HTTP request.
If the Web Service is waiting for an input body, simply select the associated type and fill the body expression:

Request headers
The request headers part allows to define a list of additional headers to send with the request.
The only difference with defining the HTTP headers with request parameters is that the request headers defined here will not be reversed the same way at the end.
In both case they will be sent as HTTP headers.
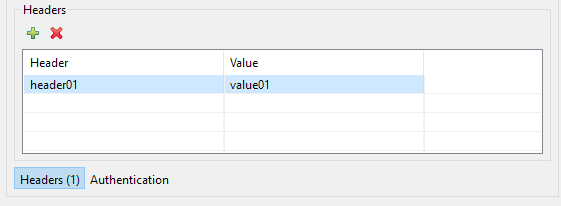
As an example, request headers will be put at this place, if you choose to reverse them at the end:
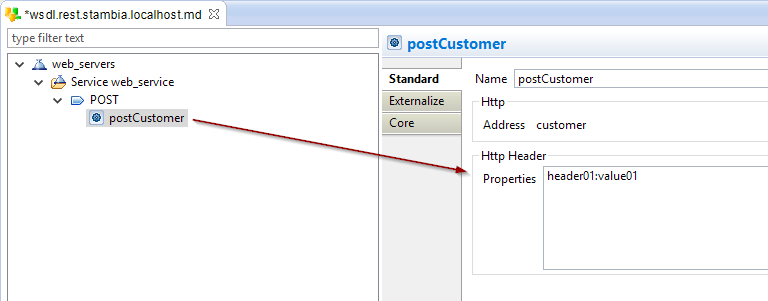
Request headers will become headers with fixed values that are sent at each invocation when the operation is used next in Mappings
Request Authentication
The request authentication part allows to define the authentication mechanism that must be used to authenticate when invoking the Web Service.
This can be either Basic authentication, OAuth1, OAuth2, or None if the Web Service isn't protected.
Select first the Authentication Type:
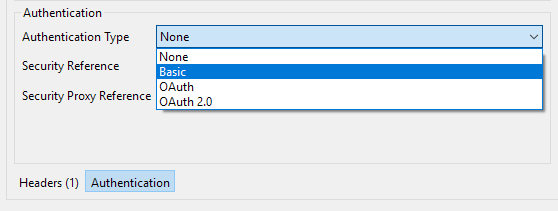
Then choose the corresponding security node that contains the authentication information:
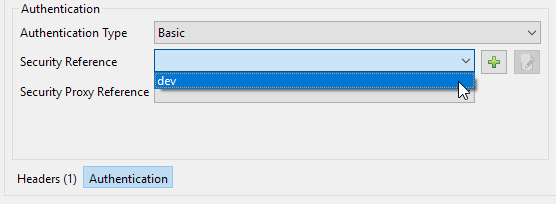
If you didn't create any security node yet on the Metadata, or you want to edit the selected one, the wizard can help:
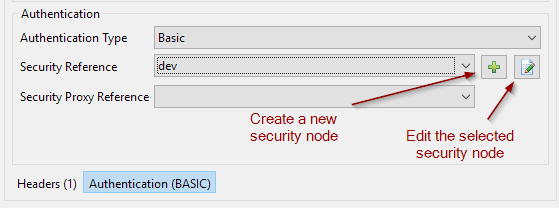
Clicking on the new or edit button will open automatically the wizard dedicated to this authentication.
Specify in the credentials and all necessary information and then click on finish on the wizard popup to come back to the REST Wizard.
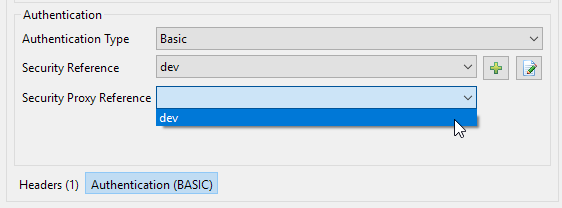
Finally, optionally specify the security node that should be used if the request is redirected through a proxy.
This is not the proxy settings for the Web Service invocation, but the authentication that should be used if the request is redirected by a proxy (proxy settings are set outside of the REST wizard, directly on the operation Metadata node, in the Proxy tab.)
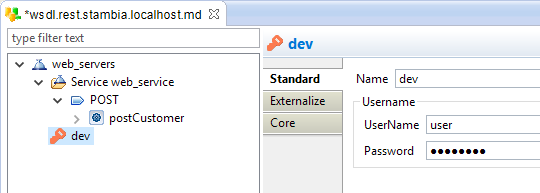
Security nodes are created / edited directly in the Metadata.
For instance, for the 'dev' node of our example:
Web Service Test and Output Definition
The request part being ready and configured, it is now time to test it by calling the Web Service, which will also allow to retrieve the response Output.
For this simply click on the top start button.
The Web Service will be called with the defined parameter, and the response will appear on the right part:
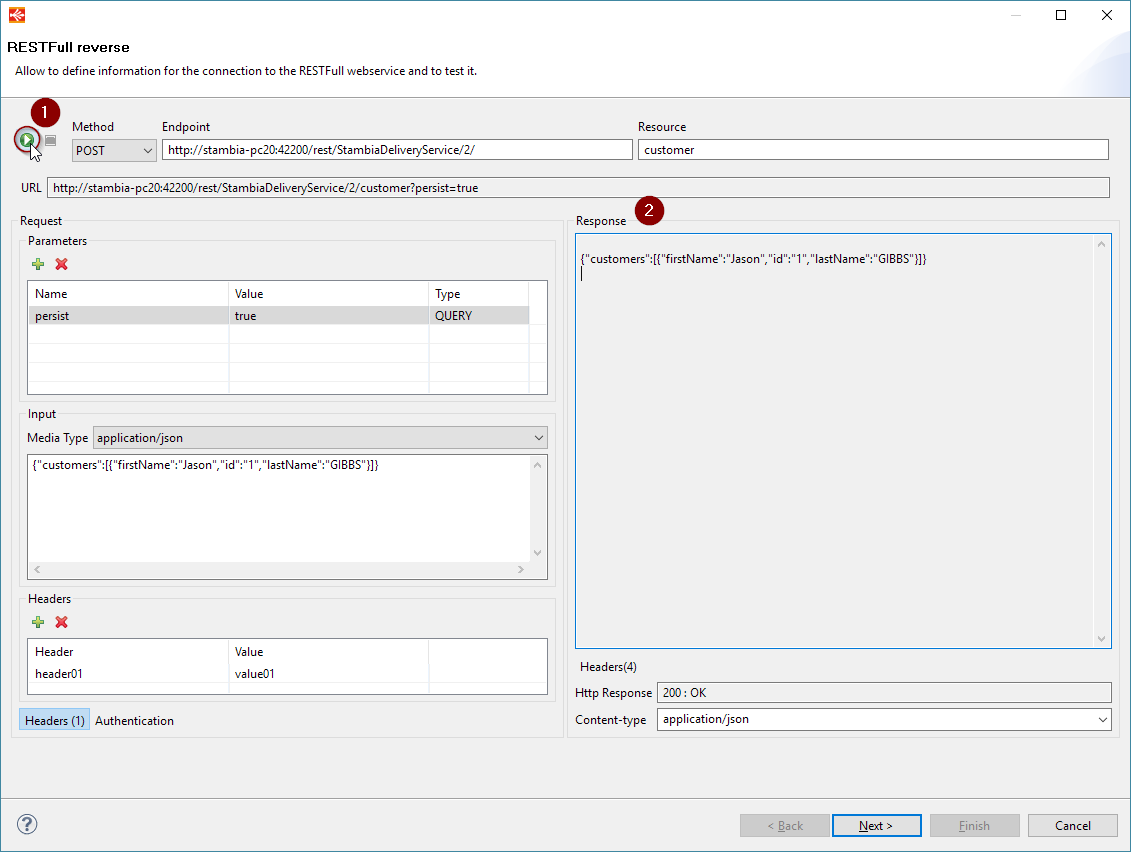
The Response body, headers, and Response code will appear there.
Check that it corresponds to what you expected, and fix the possible errors if needed by updating the request parameters accordingly.
If everything is ok, you are ready to reverse in Metadata the Web Service.
Reversing the information in Metadata
Once you are satisfied with all the request parameters and the response of the Web Service, you can click on the 'Next' button to go to the next step.
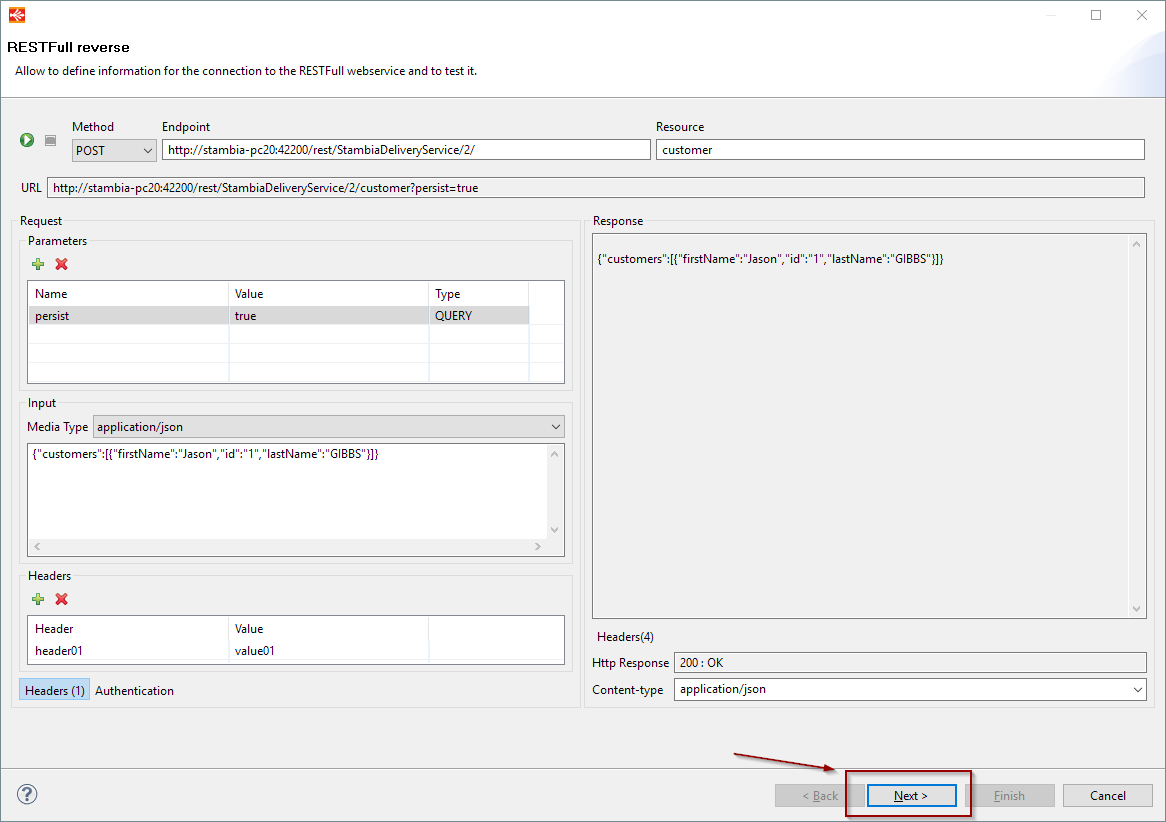
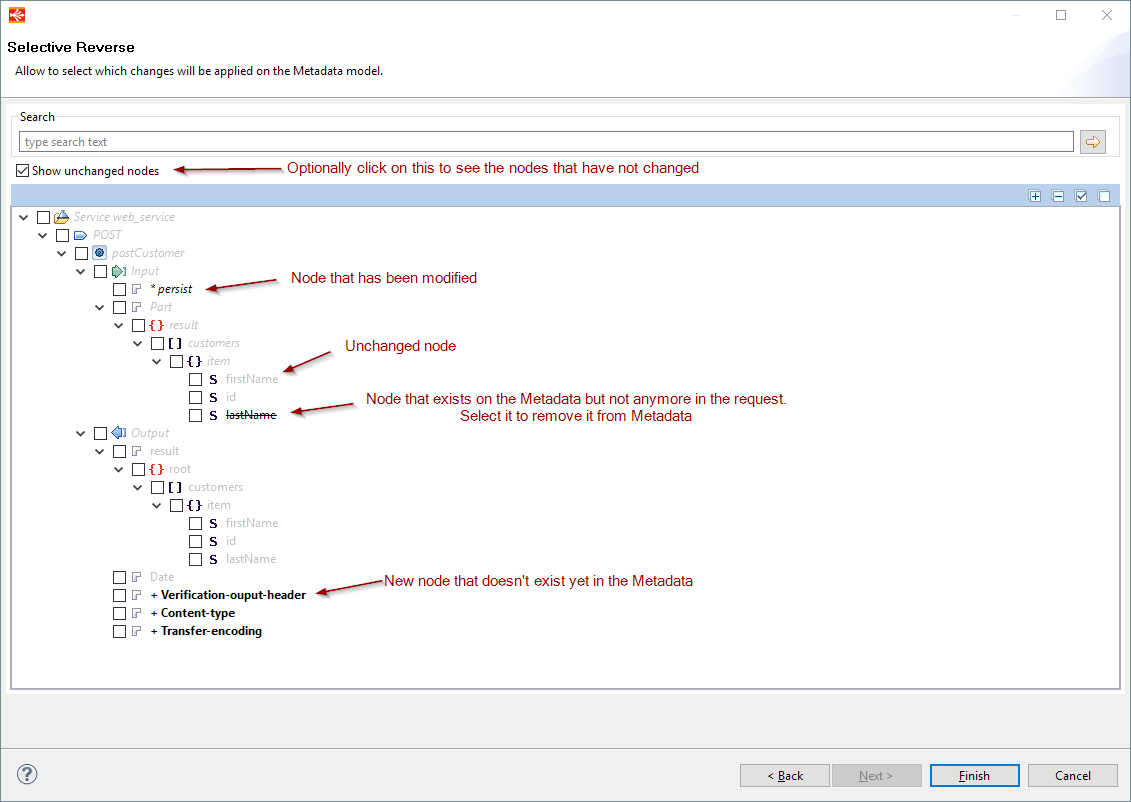
The wizard will transform all the information in Metadata nodes that will be listed in this new window, letting the user select the nodes to reverse in the Metadata.
Simply check the nodes you want to appear in your Web Service Metadata:
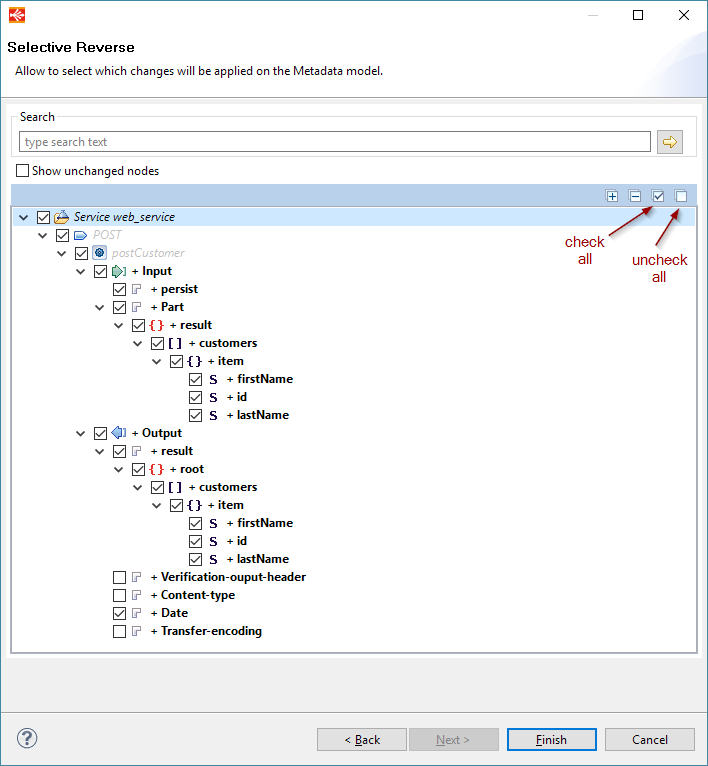
Clicking on finish will apply the modifications on the Metadata.
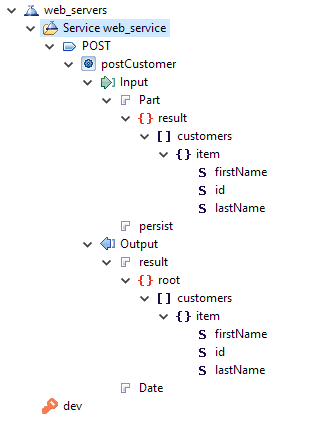
The Reverse of the Web Service is now finished, you can start using it in Mappings.
If you want to test again the Web Service with new parameters or for any reason, you can launch again the REST Wizard on it.
The wizard will open with all the existing request parameters pre-defined.
You'll next be able, in the selective reverse, to choose what changes to apply on the existing Metadata:
Troubleshooting
javax.xml.stream.XMLStreamException: Local Name cannot be null
If the following exception is thrown when invoking a Web Service reversed by the REST Wizard, check if all the nodes in the Metadata have a "Name" defined in the Properties.
Especially the node just under the "Input" node.
There is a known issue where the REST Wizard does not set a name to this node, causing then issues at invocation.
javax.xml.stream.XMLStreamException: Local Name cannot be null
    at com.sun.xml.internal.stream.writers.XMLStreamWriterImpl.writeStartElement(XMLStreamWriterImpl.java:1225)
    at com.indy.engine.actionCodes.xml.unload.g.writeStartElement(SourceFile:323)
    at com.indy.engine.actionCodes.xml.unload.g.writeStartElement(SourceFile:289)
    at com.indy.engine.actionCodes.JdbcToXmlActionCodeI.a(SourceFile:1071)
    at com.indy.engine.actionCodes.JdbcToXmlActionCodeI$IndyElement.write(SourceFile:1520)
    at com.indy.engine.actionCodes.JdbcToXmlActionCodeI$IndyElement.write(SourceFile:1524)
    at com.indy.engine.actionCodes.JdbcToXmlActionCodeI$IndyElement.write(SourceFile:1482)
    at com.indy.engine.actionCodes.JdbcToXmlActionCodeI$IndyElement.write(SourceFile:1524)
    at com.indy.engine.actionCodes.JdbcToXmlActionCodeI$IndyElement.write(SourceFile:1524)
    at com.indy.engine.actionCodes.JdbcToXmlActionCodeI$IndyElement.write(SourceFile:1524)
    at com.indy.engine.actionCodes.JdbcToXmlActionCodeI.write(SourceFile:806)
    at com.indy.engine.actionCodes.JdbcToXmlActionCodeI.executeSimpleCode(SourceFile:914)
    at com.indy.engine.action.common.ActionCodeTypeI.executeCode(SourceFile:1693)
    at com.indy.engine.action.common.ActionCodeTypeI.run(SourceFile:1852)
    at java.lang.Thread.run(Thread.java:748)
This issue will be fixed in a future version


